Introduction: Unleashing Creativity with Painters Drop Cloths
When it comes to home décor, the details are what really make the piece. Consider turning painters drop cloths into curtains for a stylish and reasonably priced room makeover. This adaptable substance, which is generally employed to shield flooring while painting, can give your windows a hint of rustic elegance. We’ll take you step-by-step through the procedure in this extensive guide, guaranteeing a smooth transition.
1. Understanding Painters Drop Cloths: A Brief Overview
Let’s get acquainted with painters drop cloths before we get started on the do-it-yourself project. These cloths, which are usually composed of sturdy cotton or canvas fabric, act as barriers to shield furniture and floors from paint. These fabrics are perfect for making curtains that have a classic charm because of their weight and neutral color.
2. Gathering Materials: What You’ll Need for the Project
To embark on this creative journey, assemble the following materials:
- Painters drop cloth (choose the size based on your window dimensions)
- Measuring tape
- Scissors
- Sewing machine or fabric glue
- Iron and ironing board
- Curtain rod and hardware
- Optional: Fabric dye for a personalized touch
3. Measuring and Cutting: Precision is Key
To figure out the size of Painters drop cloth you’ll need, start by measuring the dimensions of your window. To allow for hems and adjustments, add a few inches to both the width and length. After measuring, cut the drop cloth with sharp scissors. Make sure your cuts are even and straight for a polished look.
4. Preparing the Drop Cloth: Ironing for Flawless Appeal
To determine the size of the drop cloth required, start by taking measurements of your window. For hems and adjustments, add a few inches to the length and width. After taking measurements, cut the drop cloth with sharp scissors as needed. Ensure even and straight cuts for a polished appearance.
5. Hemming the Edges: Adding a Touch of Finesse
Hem the drop cloth’s edges to keep them from fraying and to give your curtains a polished appearance. Depending on your taste and level of experience, you can either use fabric glue or a sewing machine to accomplish this. To ensure a smooth and consistent finish, fold the edges over and tuck them in place. This step improves the overall aesthetic appeal in addition to adding durability.
6. Creating a Rod Pocket: Where Function Meets Style
Now’s the time to give your curtains a rod pocket at the top for a polished look and simple installation. Make sure there is enough room for your curtain rod to slide through when you measure and fold the fabric over at the top. Make sure the pocket can support the weight of the curtain by securing it with fabric glue or a straight stitch on the sewing machine.
7. Optional: Adding a Personalized Touch with Fabric Dye
If you’re up for the challenge, think about using fabric dye to add a distinctive flair to your curtains. Try varying the hues or patterns to fit the style of your decor. Remember that this is a completely optional step, and that the drop cloth’s neutral tones can work well with a wide range of color schemes.
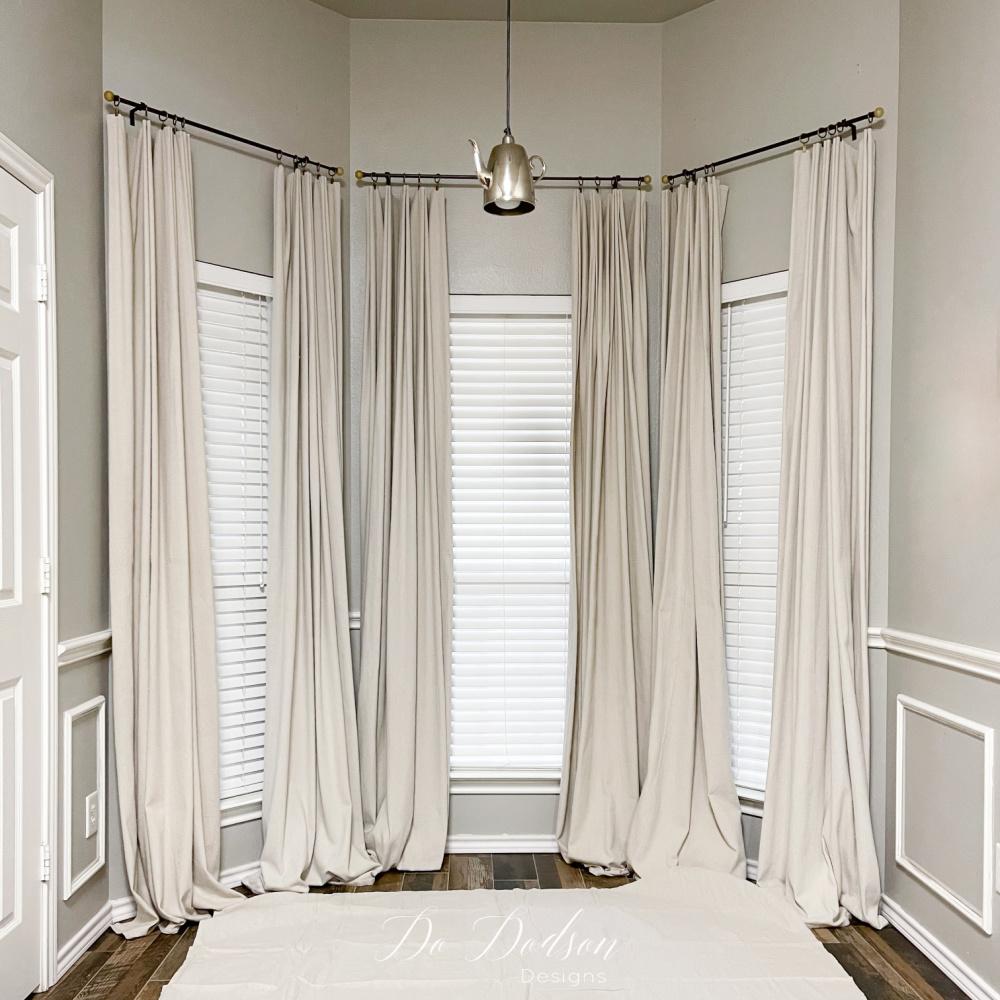
8. Hanging Your Masterpiece: Installing the Curtains
It’s time to hang your curtains now that they’ve been elevated from plain drop cloths to chic window treatments. After following the manufacturer’s instructions to install the curtain rod and hardware, insert the rod through the rod pocket you made. After adjusting the curtains to the length you want, take in the instant charm they add to your room.
Conclusion: Elevating Your Space with DIY Elegance
In conclusion, making curtains out of painters drop cloths is a rewarding and budget-friendly DIY project that can elevate the aesthetics of any room. With a little creativity and attention to detail, you can transform a humble material into a stylish window treatment that reflects your unique style. So, roll up your sleeves, gather your materials, and embark on this exciting journey to add a touch of DIY elegance to your space.